“The Engineering of Light” — how TECH Light profiles are made
Intro
In a catalogue photo, two LED profiles look identical. Same shape, same colour, a similar price. But whether a profile will hold its dimensions was decided weeks earlier — on the production floor, in fractions of a millimetre that no photo can show.
That’s why in this article we walk through profile production step by step — stage by stage. Because each one can either defend the dimension or destroy it. And a decision made on the production floor can no longer be undone — not in the warehouse, and not during installation.

Stage 1: The mold — where the dimension is born
Extrusion is, simply put, forcing a heated block of aluminium (an ingot) through a steel mold — the form that gives the profile its cross-section. Everything you’ll later measure with a caliper — wall thickness, the width of the channel for the LED strip, the geometry of the cover’s click-fit — is a reflection of the mold.
And this is where the first, invisible difference between profiles begins. The mold works under enormous pressure and high temperature, so it wears out. A worn mold doesn’t stop producing — it keeps going, just less and less accurately. The channel gets slightly wider, the click-fit slightly shallower. Imperceptible on a single piece. Across a batch: a cover that clicks one time and falls out the next.
That’s why the condition of the mold is not a technical detail — it’s the first line of defence for the dimension. A manufacturer who controls mold geometry and knows when to recondition or replace them governs what the customer won’t see, but will feel during installation.
Stage 2: Extrusion — speed versus precision
A profile leaving the mold is soft and hot — the aluminium charge works at temperatures of several hundred degrees. At this stage the material is as pliable as plasticine, and every process parameter leaves its mark on it.
The key trade-off of this stage: speed versus precision. The faster the profile is pulled, the more metres come off the line per hour — and the easier it is to get wavy walls, twisting along the axis, and an uneven surface. A thin wall, which is an asset in a finished profile (less material, lower weight, an elegant look), is a challenge on the line: the faster the metal flows, the harder it is to guide it steadily.
A smooth, even profile wall is not the result of polishing at the end. It’s the result of discipline in the middle of the process — parameters chosen for quality, not for maximum output.
Stage 3: Cooling — the moment a profile can deform
A hot profile has to be cooled. And this is the stage where the defect most troublesome for installers is born: curvature.
Aluminium cooled unevenly shrinks unevenly. One side of the profile cools faster than the other — the profile bows or twists along its length. On a two-metre length, even a small deviation is enough for the profile not to “lie” in the groove of the plaster or to stand off the furniture front. After cooling, profiles are additionally stretch-straightened — a controlled elongation that removes internal stresses and evens out the geometry.
Internal stresses, by the way, are an insidious defect: a profile can look straight in the warehouse and then “let go” only after being cut to size, when the stresses find a way out. If you’ve ever cut a profile and watched the end drift sideways — that was it. The defect arose weeks earlier, in cooling. During installation it can no longer be fixed.
Stage 4: Aging — precipitation hardening
The pre-cut profiles are placed in an aging furnace. This precipitates fine strengthening phases, significantly increasing hardness, tensile strength and yield strength while maintaining good thermal conductivity — essential for drawing heat away from the LEDs and for the structural integrity of the profile.
Stage 5: Anodizing — protection that matters
Anodizing is the electrochemical formation of a hard oxide layer on the aluminium surface. It’s responsible for the profile’s resistance to scratching and corrosion, and for a uniform, satin surface appearance.
Less obvious is that anodizing is also a dimensional process. The anodic layer has a thickness measured in micrometres — and those micrometres add to the profile’s dimension, including at the points where the cover fits. An unstable anodizing process means not only differences in shade between batches (lighter and darker profiles in a single delivery), but also minimal differences in the fit of the cover. Repeatable colour and a repeatable cover click-fit are simply two sides of the same coin: a stable, controlled process.
To lower the price, some manufacturers offer profiles in a raw version — without anodizing. The argument sounds reasonable: a profile recessed into plaster or hidden in cabinetry isn’t visible anyway, so why pay extra for surface finishing? Except that anodizing isn’t only about aesthetics. Raw aluminium oxidises and dulls over time, is far easier to scratch during installation, and the surface absorbs water, salts and acids and takes on fingerprints and dirt you can no longer remove. The fact that the profile “isn’t visible” turns out to be true only until the first service replacement of the cover, or until the cabinetry is opened. Anodizing isn’t a choice — it’s a condition for a premium solution that lasts for years.
Stage 6: Cutting — a square end is the start of a square joint
The final stage is cutting.
Cutting sounds trivial: cut the profile to a commercial length. In practice it decides two things you’ll feel during installation.
First — repeatability of commercial lengths. When you order more pieces of the same profile, they should be the same length to the millimetre; otherwise, in a long light line, everything “drifts” relative to the design. Second — edge quality. You’ll cut the profile to size on site anyway — that’s a natural part of every installation. But a clean, perpendicular factory edge gives you a reference point: a square end is easier to measure, easier to cut and easier to join. An edge with burrs or a bevel means a visible gap at the joint and a cover that, right at that spot, refuses to click in.
Every manufacturer works to length tolerances. A good cut at the manufacturer makes cutting the profile to size during installation easier.
Why we write about this as a manufacturer
Each of these stages has its own way of ruining the profile: a worn-out mold, too-fast extrusion, uneven cooling, incomplete aging, unstable anodizing — or no anodizing at all — and careless cutting. None of these defects will be fixed later by the warehouse, by the most careful packing, or by a discount. A profile’s dimension is a decision made on the production floor — and that is exactly why it can’t be taken back.
It’s also why two profiles with an identical cross-section in the catalogue can behave completely differently in the second, fifth and tenth delivery. Repeatability can be promised in a product description. It can only be ensured in the production process.
At TECH Light we watch over each of these stages so that the second box always fits the first. The material and dimensions of our profiles remain unchanged for years. This isn’t a marketing claim — it’s the way we make profiles.

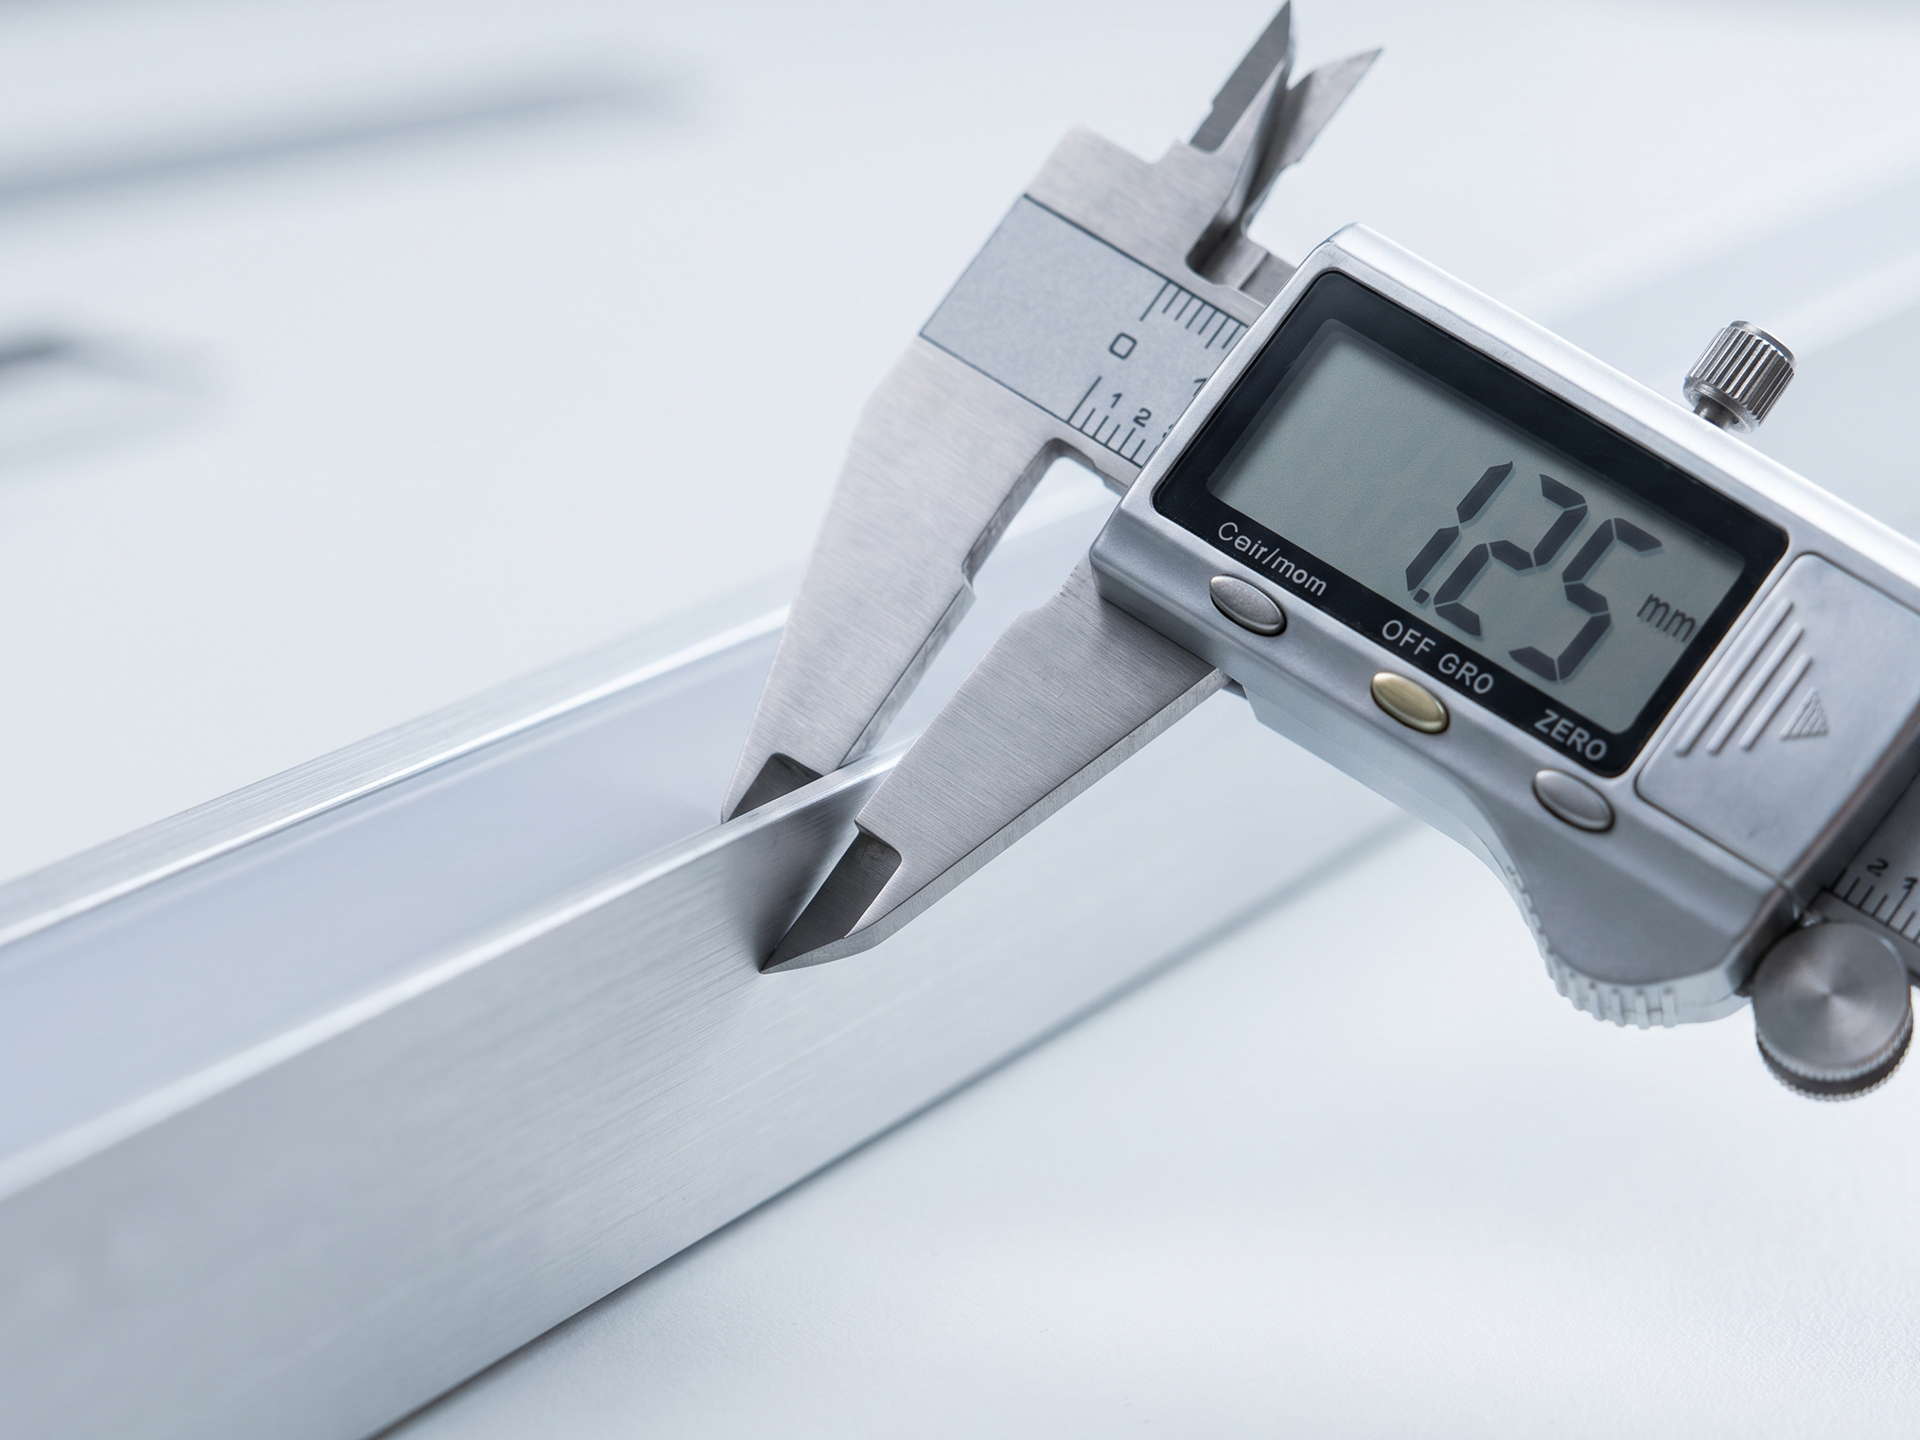
Check, don’t take it on trust
The best way to assess a profile is to pick it up. Order samples from two different batches and compare them with a precise caliper: channel width, wall thickness, cover fit. Hold two lengths against each other on a flat surface and check straightness. Put the cover on and take it off a few times — it should hold the same way every time.
A profile made in a controlled process will prove itself on installation. And if technical questions come up along the way — do contact us.
This is the first article in the “Engineering of Light” series. In the next one we’ll describe what a profile is actually for — how aluminium draws heat away from the LED strip and why it determines how long and how steadily your installation will shine.
TECH Light — premium solutions at your fingertips. [Order samples →] | [Contact your account manager →]


